 to open the Session: Add Schedules window:
The Sessions > New Sessions page steps you through the process of adding a session to a term. After you add the session, you can quickly add dates to create a schedule for the session.
The dates for the selected term are displayed in the Start / End field.
The system updates and lets you add dates to the session.
to open the Session: Add Schedules window: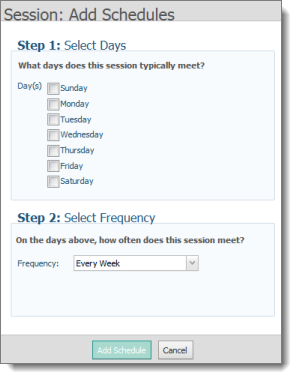
 to display a
schedule matching your criteria. For example:
to display a
schedule matching your criteria. For example: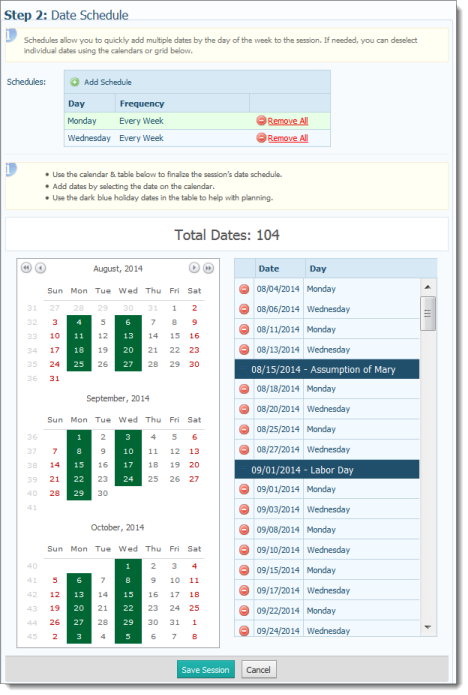
The selected date is highlighted in green to indicate it was added to the schedule.
 to the left of the date in the table.
 .
.The new session is added to the Session List tab in the left panel. Selecting the session displays its schedule in the right panel.
About the Configuration > Sessions Page