This topic shows you how to delete multiple classes from a term.
![]() WARNING
WARNING
Be aware that deleting a class permanently removes all student enrollment, leader, and attendance information from the system. This information cannot be recovered after the class is deleted.
 . Select Bulk
Class Manager option to open the Bulk
Class Manager page.
. Select Bulk
Class Manager option to open the Bulk
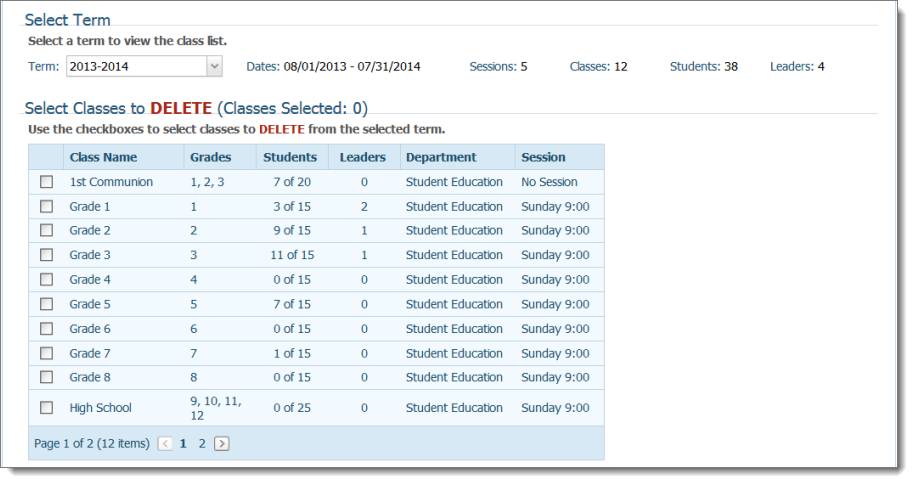
Class Manager page.A list of classes in the term is displayed:
 to advance to the next page to continue selecting classes you want
to delete.
to advance to the next page to continue selecting classes you want
to delete.The Confirmation section at the bottom of the page keeps a count of the number of classes selected.
![]() If you make a mistake,
simply check the box again to remove the checkmark
and prevent the deletion.
If you make a mistake,
simply check the box again to remove the checkmark
and prevent the deletion.
![]() By checking this box
you are indicating your understanding that the selected classes will be
deleted and that all associated information will be permanently removed
and cannot be recovered.
By checking this box
you are indicating your understanding that the selected classes will be
deleted and that all associated information will be permanently removed
and cannot be recovered.
 .
.You advance to the Complete! tab where the Operation Successful! message is displayed. Message details show you the name of the term in which classes where deleted along with the number of classes deleted.
 to return to the
Bulk Class Manager page.
to return to the
Bulk Class Manager page.
About the Bulk Class Manager Page