How to Manage Class Details for Multiple Classes
- Click
 . Select Bulk
Class Manager option to open the Bulk
Class Manager page.
. Select Bulk
Class Manager option to open the Bulk
Class Manager page.
- On the Select Action
tab, select the Manage Current Classes or
Add Multiple Classes option.
- Click the Term & Classes
link in the lower right to advance to the Terms
& Classes tab. Then, from the Term list, select
the term you want to work in.
A list of classes in the selected term is
displayed. For example:
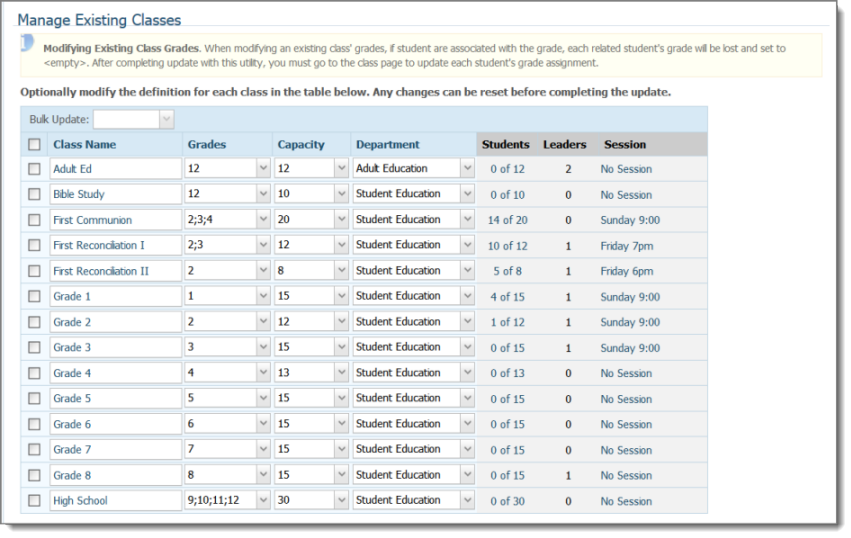
You can modify class details in one of two
ways:
- Perform a bulk update: use the Bulk
Update feature to change the same value for all selected classes.
You can bulk change the department, grade levels, or enrollment numbers
for all selected classes.
- Make individual changes: make specific changes
to each class individually.
- Check the box next to each class in the list that
has details that you want to modify. Then, do one of the following:
- To perform a bulk update, select the desired
detail from the Bulk Update list. Next,
select the new value from the
 list that appears
on the right. Then, click
list that appears
on the right. Then, click  to apply the same change
to all selected classes.
to apply the same change
to all selected classes.
- To individually update classes, select new
values from the Grades, Capacity,
and Department lists.
 If you make a mistake,
click Reset to return to the original setting.
If you make a mistake,
click Reset to return to the original setting.
- Click
 .
.
You advance to the Complete!
tab. The Operation
Successful! message is displayed. Message details show you the
name of the term in which classes where added along with the number of
classes added.
- Do one of the following:
- Click the Go to Classes
for Term button to display the Classes
page. The added classes appear in the list on the Class
List tab.
- Click
 to return to the
Bulk Class Manager page.
to return to the
Bulk Class Manager page.
Related Topics
About the Bulk Class
Manager Page
<Back
to top>