Click  to display the
Lookup Management page.
to display the
Lookup Management page.
This topic shows you how to add, delete, and change records in the Buildings lookup table.
Adding a New Record to the Buildings Lookup Table
Changing the Name of a Building
Reorganizing the List of Building Records
Click to display the
Lookup Management page.
Records in the Buildings lookup table are displayed. For example:
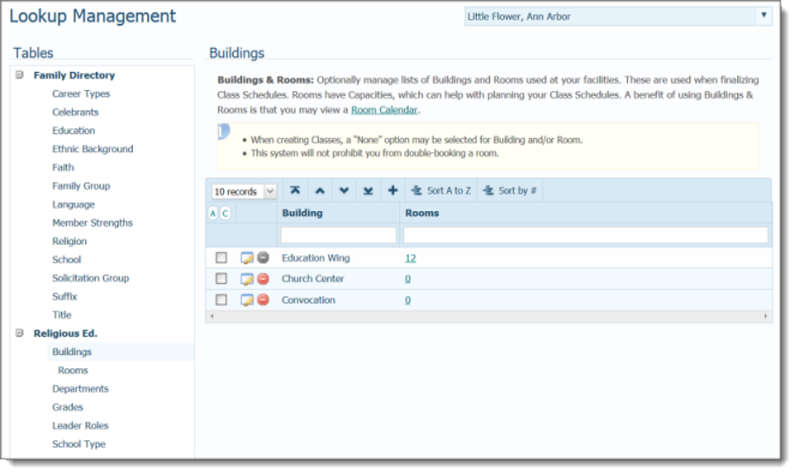
To add a new record to the table, complete the following:
Click  to open the Add "Building" Record window:

In the Building Name field, type a name for the new record.
Click  .
.
The record is added to the Buildings lookup table. In the Religious Education module, the corresponding option is added to Buildings dropdown lists.
to display the
Lookup Management page.Records in the Buildings table are displayed. For example:
 to
open the Edit "Building" Record
window.
to
open the Edit "Building" Record
window.
.png) .
.The Buildings table is updated with the record's new name. The corresponding option in the Buildings dropdown list in the application is also updated.
Use the Move record buttons in the toolbar to reorganize records in the list.
Select one or more records.
Click the buttons to relocate the records:
 Moves selected records
to top of the list (to the first position).
Moves selected records
to top of the list (to the first position).
 Moves the selected records
up the list one row at a time.
Moves the selected records
up the list one row at a time.
 Moves the selected records
down the list one row at a time.
Moves the selected records
down the list one row at a time.
 Moves selected records
to the bottom of the list (to the last position).
Moves selected records
to the bottom of the list (to the last position).
To permanently save the new
list order, click  .
.
to display the
Lookup Management page.Records in the Buildings table are displayed.
![]() If a building cannot be deleted
from the records list, the delete button is grayed out:
If a building cannot be deleted
from the records list, the delete button is grayed out:  . You cannot delete
a building if it has rooms associated with it. You must delete the rooms
first.
. You cannot delete
a building if it has rooms associated with it. You must delete the rooms
first.
 .
.The record is removed from the Buildings table. In the Religious Education module, the corresponding option is also removed from the Buildings dropdown lists.
About the Lookup Management Page
Understanding Lookup Management