 to display the Scheduling page.
 .
.
After you generate a schedule, you can easily make manual changes to fill any remaining open slots or to remove a minister from a filled position.
Use the following procedure to add specific ministers to an event and remove ministers who are already scheduled.
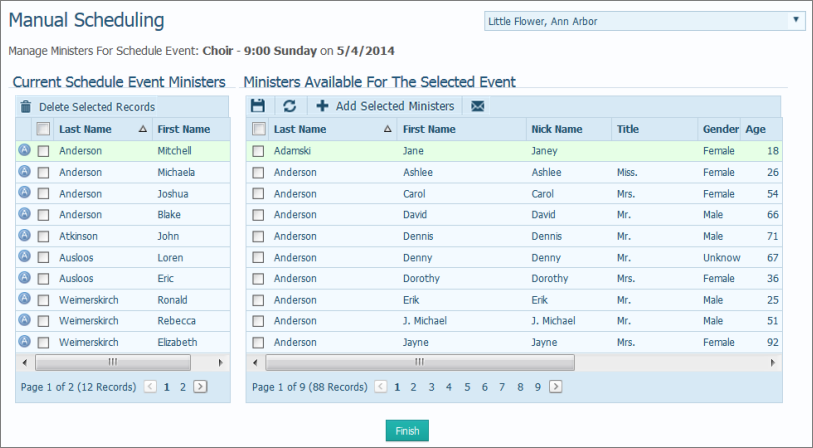
to display the Scheduling page. .The Manual Scheduling page is displayed. The page shows you a list of ministers who are currently scheduled and a list of ministers who are available to serve at the event you selected.
 .
.A message is displayed to let you know how many ministers were added to the schedule for the event.
 to dismiss the message.
The ministers you selected are added to the Current Schedule Event Ministers in the left panel. This icon is displayed next to the minister's name to let you know that the minister was manually scheduled: ![]() .
.
 .
.A message is displayed asking you to confirm the deletion.
to confirm the deletion. Then, click to dismiss the message informing you that the minister was removed from the schedule. to return to the main Scheduling window.
If your events have positions that still need to be filled, you can use the auto-scheduler to quickly fill them. For details, go to Using_the_Autoscheduler_to_Create_a_Schedule.
How to View the Status of Minister Assignments for an Event