Envelope number reports list the envelope numbers belonging to families and members in the selected organization who indicate that they want to receive contribution envelopes. Two types of reports are available: "full" and "filtered." This topic explains the differences between the two and shows you how to generate each type.
Send Contrib. Env. Checkbox and Envelope # Field
Creating a Full Envelope Numbers Report
Full Envelope Numbers Report Example
Creating a Filtered Envelope Numbers Report
Filtered Envelope Numbers Report Example
ParishSOFT Family Directory features two types of envelope reports:
● Full Envelope Numbers report
● Filtered Envelope Numbers report
Both reports give you a list of envelope numbers assigned to families and members who have indicated in their family record that they want to receive contribution envelopes. A "full" report lists all of the families or all of the members who want to receive contribution envelopes. This report is a master list of names and envelope numbers assigned to those who want contribution envelopes. A "filtered" report, as the name implies, contains specific records. To generate this type of report, you apply filters to obtain a specific list (for example, a list of numbers assigned to registered and inactive families only or a list of numbers assigned to members who are retired).
Both reports can be used to verify envelope number assignments. They can also be sent to your envelope vendor, who can use the information to print numbered contribution envelopes. Because the report contains mailing names and addresses, the vendor can ship the envelopes directly to families and members on your lists.
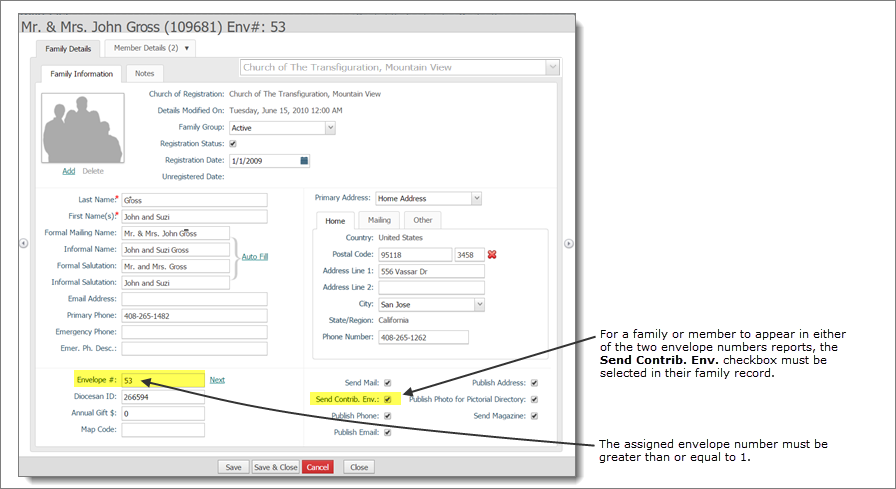
In every family record, there is a checkbox control labeled Send Contrib. Env (see illustration below). If a family wants to receive contribution envelopes, this checkbox is selected (checked). Both the "full" and "filtered" envelope numbers reports use this checkbox control. When you generate either report, the system looks to see whether the checkbox is selected. Only if it is selected can a family or member be included in the "full" and "filtered" reports.
In addition to verifying that the Send Contrib. Env. checkbox is selected, the system looks at the value in the Envelope # field in the family record. As shown in the illustration below, the value in this field must be greater than or equal to 1 for a family or member to be included in the reports.
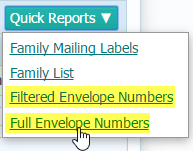
The Filtered Envelope Numbers and Full Envelope Numbers reports appear as options on the Quick Reports menu. A Quick Reports menu is located on the Family List and Member List pages.
When you generate envelope numbers reports from the Family List page, the reports use Family List data. When you generate the reports from the Member List page, they use Member List data.
To create a list of all families or all members that want to receive envelope numbers:
 to display the Family List page.
 to display the Member List page.
If you manage multiple organizations, select the desired organization from the Organization list.
 . From the displayed menu, select the Full Envelope Numbers option.
The Full Envelope Numbers report opens in the Report Viewer. The records in the report are sorted in ascending order by envelope number.
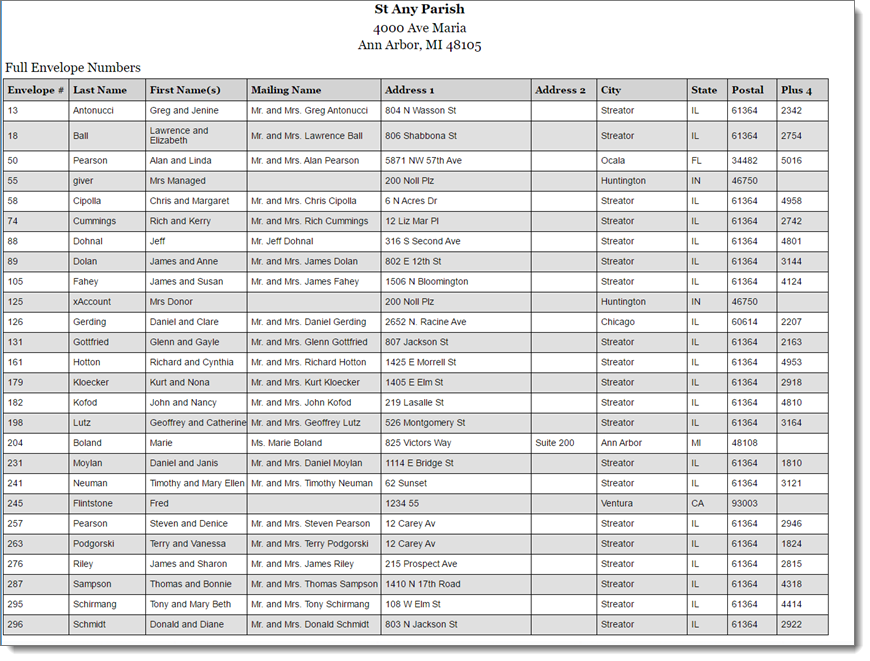
The following illustration shows you an example of the Full Envelope Numbers report. The report was generated from the Family List page so it includes the names of all families in the selected organization who want to receive contribution envelopes (families having the Send Contrib. Env. checkbox selected).
The records in the report are sorted in ascending order by envelope number. Each record occupies a row. The columns show the following information: assigned envelope number, last name and first name, mailing name, and mailing address information.
This report lets you apply filters to obtain a list of envelope numbers assigned to specific types of families or members.
to display the Family List page. to display the Member List page.If you manage multiple organizations, select the desired organization from the Organization list.
Apply filters to the list. To do this, complete the following:
On the toolbar, click  (Advanced Filter) to open the advanced filter window.
Select your filter criteria.
Click  .
.
You return to the main list. This grid shows only the records of families or members matching your filter criteria.
The system will pass the information in these records to the report.
To create the report:
By default the records in the generated report are sorted in ascending order on the Envelope # column. If you want to sort the records on a different column, select the desired column in the grid. Be sure to also select the desired sort order (![]() ascending or
ascending or ![]() descending).
descending).
For example, if you want the records in the report sorted on the family's or member's name, in the grid click the Family (Family List) or Member Last (Member List) column header. The directional arrow on the header indicates the direction of the sort: ![]() ascending. To change the sort order to descending, click the column header again.
ascending. To change the sort order to descending, click the column header again.
Click . From the displayed menu, select Filtered Envelope Numbers.
The Filtered Envelope Numbers report opens in the Report Viewer. The families or members listed in the report are those matching your filter criteria that also have the Send Contrib. Env. checkbox selected. Note that the records are sorted on the column you selected in the grid.
![]() In most cases, the report shows fewer records than the grid does. This is because the grid shows records matching your filter criteria only. The report shows records that both match your filter criteria and have the Send Contrib. Env. checkbox selected.
In most cases, the report shows fewer records than the grid does. This is because the grid shows records matching your filter criteria only. The report shows records that both match your filter criteria and have the Send Contrib. Env. checkbox selected.
Suppose that you want to create an envelope numbers report that shows registered, inactive families only. To create this report:
to display the Family List page.Apply filters to the Family List page by doing the following:
On the toolbar, click (Advanced Filter) to open the advanced filter window:
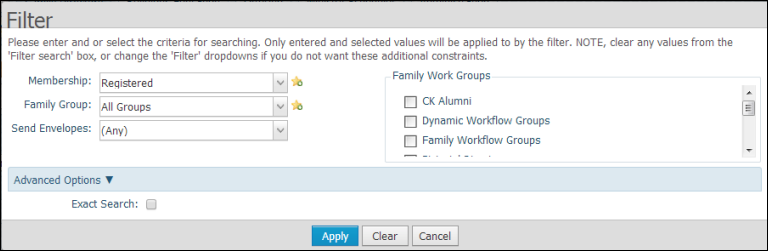
Because you want to limit the report to show registered families, select Registered from Membership dropdown list.
Because you want to limit the report to show inactive families, select Inactive from the Family Group dropdown list.
Click .
You return to the Family List. The only records in the grid are those matching the filter selections: registered, inactive families.
The system will pass the information in these records to the report.
To create the report:
By default the information in the generated report is sorted in ascending order on the Envelope # column. To sort the records in the report in descending order by the family's last name, click the Family column header twice. This icon appears in the Family column header to indicate the direction of the sort: ![]() .
.
Select Filtered Envelope Numbers from the Quick Reports menu:
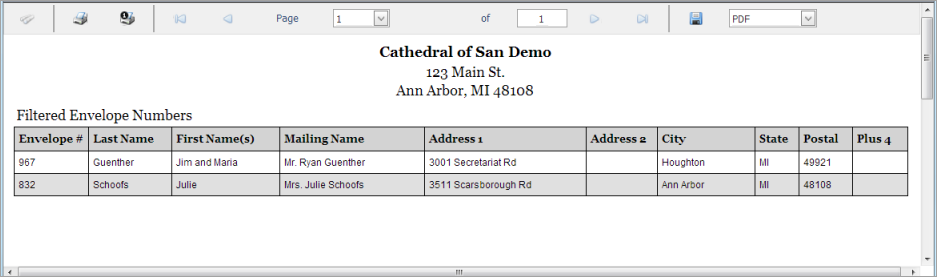
The report opens in the Report Viewer. The families listed in the report are those matching your filter criteria that also have the Send Contrib. Env. checkbox selected.
![]() In most cases, the report shows fewer records than the grid does. This is because the grid shows records matching your filter criteria only. The report shows records that both match your filter criteria and have the Send Contrib. Env. checkbox selected.
In most cases, the report shows fewer records than the grid does. This is because the grid shows records matching your filter criteria only. The report shows records that both match your filter criteria and have the Send Contrib. Env. checkbox selected.
Following is an example of a Filtered Envelope Numbers report. The records in the report are sorted in descending order by last name. Each record occupies a row. The columns show the following information: assigned envelope number, last name and first name, mailing name, and mailing address information.
You can print, save, or export the report to a .csv file. For instructions, go to How to Print, View, and Save Reports.
How to Print, View, and Save Reports