You can customize the layout of many of the main pages in the Offering module to meet your needs.
Sorting the Display of Records
Sorting the Grid on a Single Column
Sorting the Grid on Two Columns
Changing the Number of Records Displayed Per Page
Permanently Saving Sort Settings and Layout Changes
Resetting the Layout to the Default Configuration
On the Fund Management, Pledge Management, and Giving History pages, you can easily change the width of a column to make it wider or narrower.
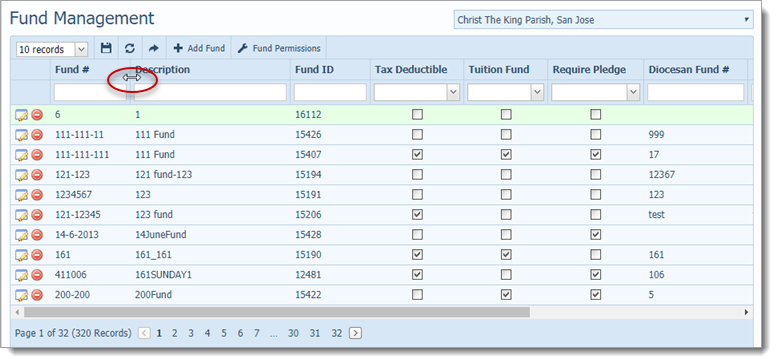
Position your mouse pointer on the line between the column that you want to widen (or narrow) and the column next to it.
A double-arrow cursor is displayed at the boundary line between the two columns, as shown in the following illustration:
Click the left mouse button and drag the boundary line right or left to respectively widen or narrow the column to the left of the cursor.
Release the mouse button after the column is the width that you want it to be.
You can rearrange the columns in the layout to suit your particular preference for viewing information. After rearranging the columns, you can permanently save your new layout so that the next time you display the page, your new layout is displayed.
Click and hold the left mouse button while dragging the desired column to a new location.
As you drag the column, a double-arrow cursor is displayed at each boundary between the columns. This special cursor lets you know where you can release the mouse button to relocate the column.
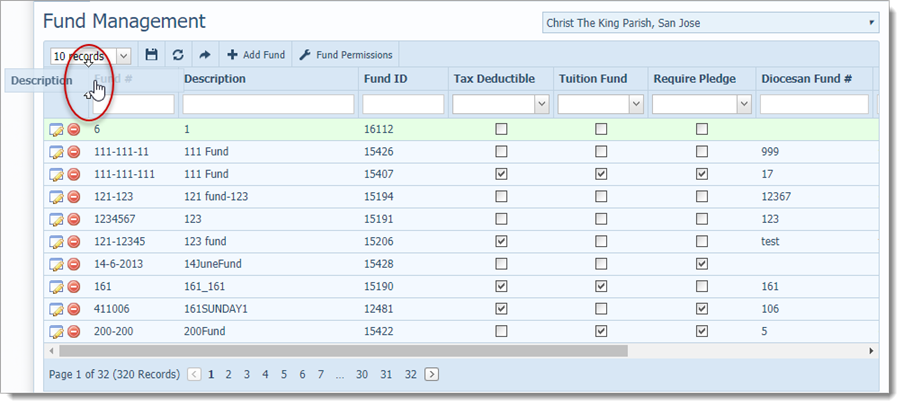
In the above illustration, the user wants to put the Description column before the Fund # column. The double-arrow cursor marks the location where the column can be placed.
When the column is where you want it, release the left mouse button.
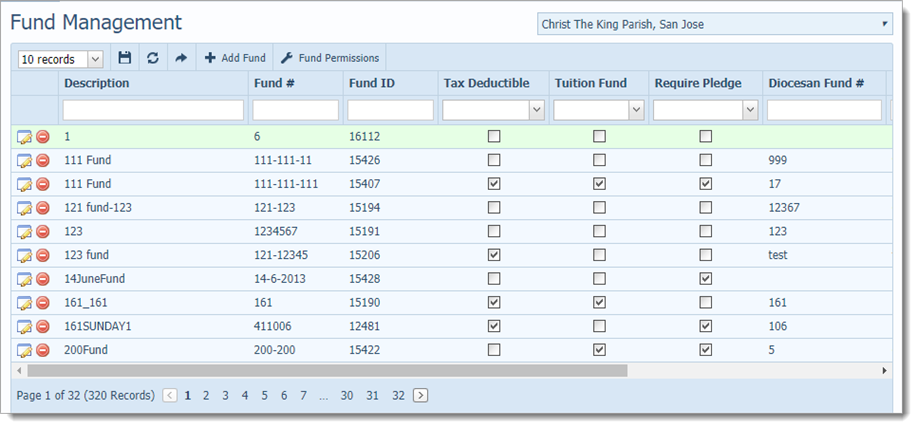
The content reloads and the column appears in its new location (before the Fund # column), as shown in this illustration:
If desired, you can permanently save your column changes so that they are in effect the next time you display the page or you can reset the layout to the default configuration.
Sorting is a process of arranging the records in a systematic way based on type of data in a particular column. Text data is sorted alphabetically (in A to Z or Z to A order), number data is sorted numerically (from smallest to largest or largest to smallest), and date data is sorted chronologically (from most recent to least recent or least recent to most recent). The sorting functionality is applied to columns in many of the application's grids. When sorting is applied to a column, one of the following icons appears to the right of the column header:
![]() To switch between ascending and descending order, click the column heading.
To switch between ascending and descending order, click the column heading.
![]() (Ascending): this sort icon looks like an up arrow. It indicates that the data in the column is sorted in ascending order, which means that successively higher values (alphabetic or numeric) are displayed as you proceed down the column. For alphabetic sorts, ascending order is from A to Z. For numeric sorts, ascending order is from 0 to 9. For date and time sorts, ascending order puts the recent dates first.
(Ascending): this sort icon looks like an up arrow. It indicates that the data in the column is sorted in ascending order, which means that successively higher values (alphabetic or numeric) are displayed as you proceed down the column. For alphabetic sorts, ascending order is from A to Z. For numeric sorts, ascending order is from 0 to 9. For date and time sorts, ascending order puts the recent dates first.
![]() (Descending): this sort icon looks like a down arrow. It indicates that the data in the column is sorted in descending order, which means that successively lower values (alphabetic or numeric) are displayed as you proceed down the column. For alphabetic sorts, descending order is from Z to A. For numeric sorts, descending order is from 9 to 0. For date and time sorts, descending order puts later dates first.
(Descending): this sort icon looks like a down arrow. It indicates that the data in the column is sorted in descending order, which means that successively lower values (alphabetic or numeric) are displayed as you proceed down the column. For alphabetic sorts, descending order is from Z to A. For numeric sorts, descending order is from 9 to 0. For date and time sorts, descending order puts later dates first.
To sort the grid on a single column, simply click the desired column header. For example, to sort data in the Fund Management grid by fund descriptions, click the Description column heading, as shown below:
Sometimes you may want to sort data in a grid on more than one column. For example, if you are working in the Member List, you may want to display it sorted first by last name and then by first name. This type of sort can be useful when you have multiple members with the same last name. It can make it easier to find the member you are looking for.
To sort a grid on two columns:
Click the header of the column you want to use for the primary sort.
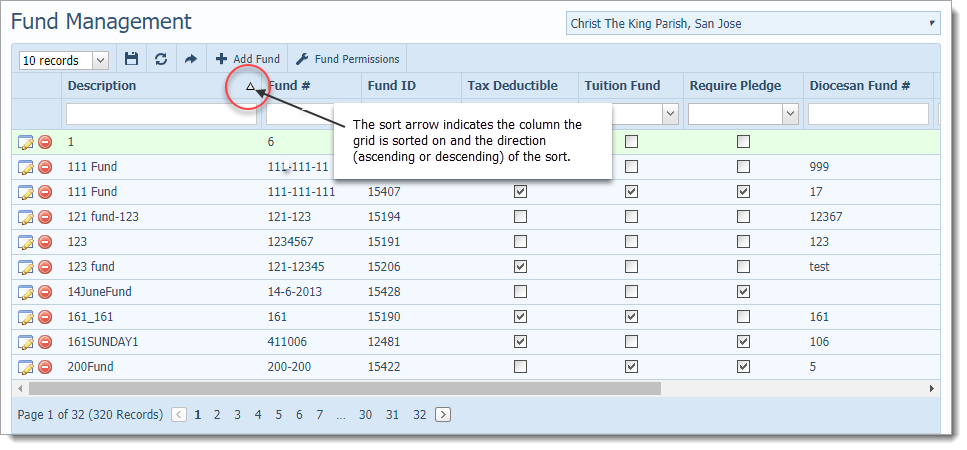
![]() After you click the header, a sort icon appears on the header to let you know the data in the column is being sorted on and to indicate the direction of the sort.
After you click the header, a sort icon appears on the header to let you know the data in the column is being sorted on and to indicate the direction of the sort.
Using our Member List example, this would be the Member Last column.
If the sort direction on the column is not correct, click the header again to change the direction.
The grid updates to show you the results of the sort.
Press and hold the Shift key while clicking the header of the column you want to use for the secondary sort.
In our example, this would be the Member First column.
If the sort direction on the column is not correct, press and hold the Shift key again while clicking the column header to change it.
The grid updates to show you the sort results.
The following illustration shows you the results of a two-column sort applied to the Member List grid. In this example, member records are sorted first by last name (primary sort) and then by first name (secondary sort). Note how the sort makes it easier to find the records of individuals with the same last name.

If desired, you can permanently save your sort settings so that they are in effect the next time you display the page.
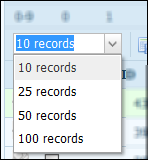
By default, ten records are displayed per page. To change the number of records that you can view on each page, select the desired option from the # Records box:
![]() To speed up page loading, select a lower value.
To speed up page loading, select a lower value.
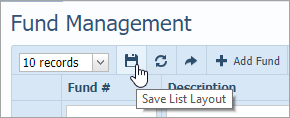
If desired, you can permanently save your new layout (sort settings and column changes) on the Fund Management List, Pledge Management, and Contribution List pages so that the settings are in effect the next time you display them. To do this, click  (Save List Layout).
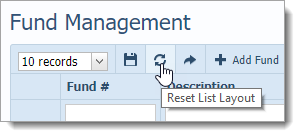
To reset the layout to the original view (default settings), click  (Reset List Layout).
About the Fund Management Page
About the Pledge Management Page
About the Contribution List Page
How to Apply Column Filters to a List