The Religious Education Reports page enables you to set up and create a number of class-related reports, such as class lists, rosters and attendance sheets, schedules, and mailing labels. Each report is fully customizable. Simply select the desired options and settings, and then click a button to generate a report that you can save, print, or export to other formats.
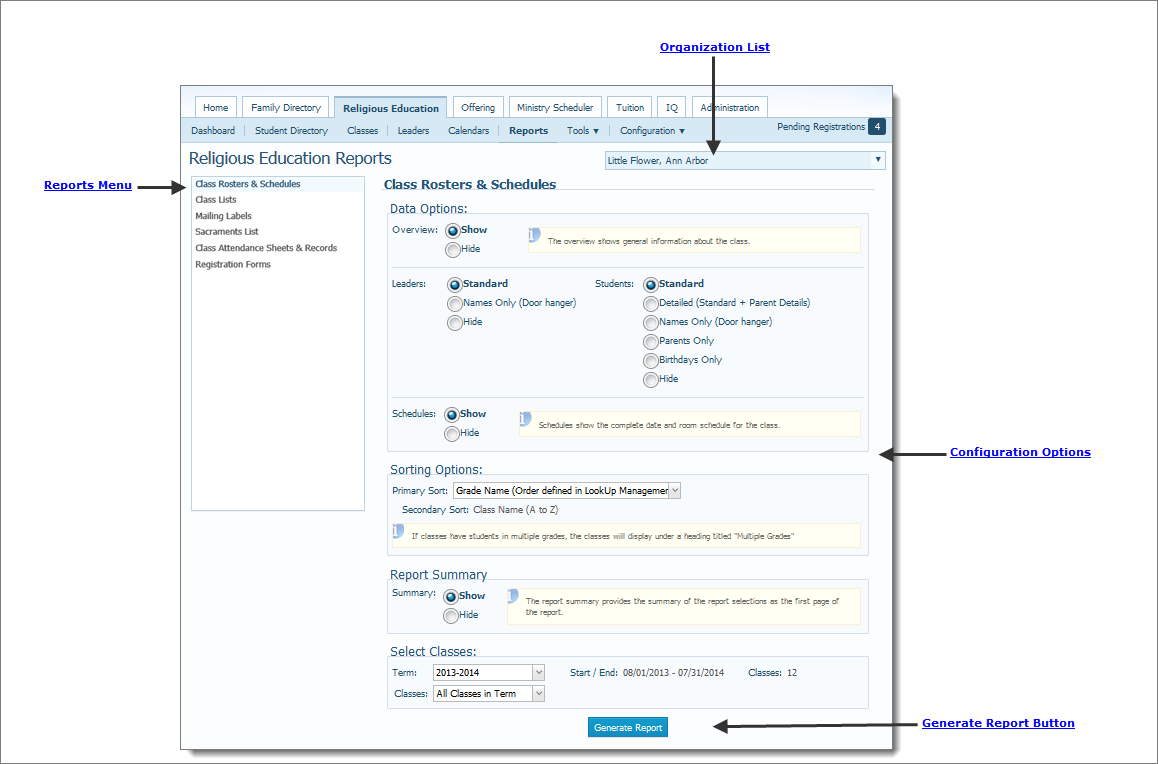
The illustration below identifies the main elements on the Religious Education Reports page. Place your mouse pointer over a hyperlink (without clicking) to view a general description of an element. Click the hyperlink to jump to the section on this page that provides more detailed information.
The organization associated with your ParishSOFT login credentials automatically appears in the Organization list, which is located in the upper-right corner of the Religious Education Reports page:

If you manage multiple organizations, click  , and then select the organization whose leader records you want to work with from the list:

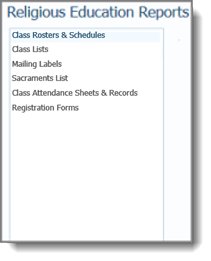
The Reports menu, in the left panel, lists the reports you can create. Select a report from the menu to display its configuration options in the right panel.
When you select a report from the Reports menu in the left panel, the report's configuration options are displayed in the right panel. Select options to configure the report to meet your needs. Following are descriptions of the types of configuration options available.
● Data options: configure the content of a report.
● Sorting options: modify the organization of report content.
● Report summary: provides a summary of the configuration options selected. This summary appears as the first page of the report.
● Term and class selections: let you specify which classes to include in the report.
● Show/Hide: enable you to include or exclude information in the report.
After selecting the desired options to configure the report, click  to create the report. The report opens in the Report Viewer where you can save, export, and print the report.
How to Create a Class Roster and Schedule
How to Create a Sacraments List Report
How to Create Attendance Sheets and Records
How to Print, View, and Save Reports