The Reports page provides a variety of easy-to-use reporting tools that can quickly present different views of your data, helping you to make faster and more informed financial decisions. The reporting tools are specific in their function. Following is a list and description of the reports you can create:
![]() You
must have an active assignment in the selected organization and, at a
minimum, View + Print permissions
for ParishSOFT Tuition to create these reports.
You
must have an active assignment in the selected organization and, at a
minimum, View + Print permissions
for ParishSOFT Tuition to create these reports.
● Customer Activity
The Customer Activity report provides a snapshot of invoice activity within your choice of date range and/or range of invoice numbers. For each selected customer, the report provides these details: invoice date, customer's name, invoice total, total paid, and balance due. For instructions on how to create this report, go to How to Create a Customer Activity Report.
● Fund Activity
The Fund Activity report gives you status on selected funds within your choice of date range, enabling you to see by fund total invoiced amounts, paid amounts, and current balances. For each fund listed in the report, the following information is provided: the total invoiced amount, total paid, and net amount. For instructions on how to create this report, go to How to Create a Fund Activity Report.
● Invoices
The Invoices report is used to generate detailed invoices and billing statements that can be printed and sent to your customers.
![]() Important
Important
Printed customer invoices are designed to fit into a double-window number 9 envelope (3 7/8 by 8 7/8 inches). If you are mailing invoices, make sure that you purchase the correct envelope size.
The invoice includes the following basic information:
Name and address of your organization
Name and address of the customer you are invoicing
Invoice description and a unique invoice number
Invoice details that show the date of the invoice, billed items, and the total amount due.
For instructions on how to create this report, go to How to Create an Invoices Report.
● Statements
The Statements report shows all invoice and payment activity for selected customers within your choice of date range. These statements can be printed and sent to customers so that they can see their payment history, which includes fully paid invoices and invoices with outstanding balances.
![]() Important
Important
Printed customer statements are designed to fit into a double-window number 9 envelope (3 7/8 by 8 7/8 inches). If you are mailing statements, make sure that you purchase the correct envelope size.
An option is provided in the report setup that lets you include a remittance slip showing the customer's name and the balance due. Customers can tear off the slip and return it with their payments. For instructions on how to create this report, go to How to Create a Statements Report.
● Overdue
The Overdue report enables you to find out which customers have outstanding balances on invoices within your choice of date range. You can quickly see when invoices are due and the amounts owed. The report filters can be used to generate a report that shows a specific group of past due customers or a list of all customers with delinquent accounts. For instructions on how to create this report, go to How to Create an Overdue Report. customers.
The illustration below identifies the main areas on the Reports page. Place your mouse pointer over a link (without clicking) to view a general description of an area. Click the link to jump to the section on this page that provides more detailed information.

To access the Reports page, you must have an active assignment in the selected organization. In addition, at a minimum, you must have View + Print permissions assigned to your login credentials.
The organization associated with your ParishSOFT login credentials automatically appears in the Organization list, which is located in the upper-right corner of the Invoices page. If you manage several organizations, select the organization you want to work in.
![]() Only
the organizations for which you have View access
rights are displayed in the Organization list.
Only
the organizations for which you have View access
rights are displayed in the Organization list.
The Report menu lists the available reports.
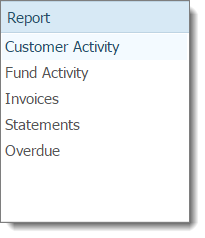
Select a report to display its setup in the right panel.
Selecting a report from the Report menu displays its setup in the right panel. The setup varies depending on the report you select. For example, selecting the Statements report displays this setup:
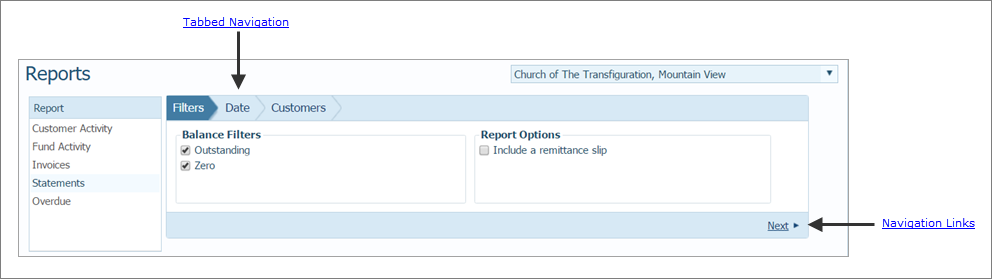
Each report setup uses tabbed navigation, a single row of tabs across the top of the right panel that guide you through the process of setting up the report. Follow the path by selecting the tabs in the order presented or clicking the navigation link in the lower-right.
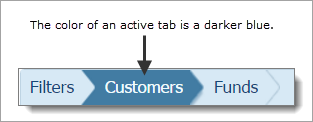
By default, when you select a report from the Report menu, the first tab in the setup is selected for you. Note that, when selected, a tab protrudes slightly and turns a darker blue to let you it is active and ready to accept your input.
In the lower-right corner of each tab, one of these navigation links appears: Next or Previous.
● Click Next to advance to the next tab in the setup.
● Click Previous to return to the previous tab.
![]() The
View button is located on the last
tab in a report's setup. The label text on this button changes depending
on the type of report you are creating. For example, for the Statements
report, the button is labeled View Statements.
The
View button is located on the last
tab in a report's setup. The label text on this button changes depending
on the type of report you are creating. For example, for the Statements
report, the button is labeled View Statements.
After completing the setup for a report, click the View button to open the report in the Report Viewer.
The controls in the viewer let you print the report, save it, or export it to different formats. For details, go to About the Report Viewer.
How to Create a Customer Activity Report
How to Create a Fund Activity Report
How to Create an Invoices Report
How to Create a Statements Report
How to Create an Overdue Report